Last Updated on January 6, 2025
To use the Parent Choice Bottle Warmer, fill it with water according to the instructions, place the bottle inside, and select the desired warming setting. Make sure to clean and sanitize the sterilizer after each use for proper hygiene.
This bottle warmer and sterilizer combination provides convenience and control for warming bottles and sterilizing pacifiers. It is an easy-to-use solution for parents who want efficient and reliable bottle warming and sterilizing capabilities. With its various settings, this bottle warmer is a great choice for busy parents on the go.
Enjoy the simplicity and convenience of the Parent Choice Bottle Warmer for your baby’s feeding needs.
Parent Choice Bottle Warmer
Discover the easy steps to using the Parent Choice bottle warmer for warming your baby’s bottles quickly and efficiently. With clear instructions and convenient features, this bottle warmer ensures that your baby’s milk is the perfect temperature every time.
Overview
When it comes to feeding your baby, having a bottle warmer can make the process much easier and more convenient. One popular option on the market is the Parent Choice Bottle Warmer. This bottle warmer is designed to quickly and efficiently warm your baby’s bottle to the perfect temperature. In this article, we will provide an introduction to the Parent Choice Bottle Warmer, including its benefits and features, so you can make an informed choice for your baby’s feeding needs.
Benefits
The Parent Choice Bottle Warmer offers several benefits that make it a top choice for parents. One of the main benefits is its ability to warm your baby’s bottle rapidly and evenly. With this bottle warmer, you no longer have to wait for your baby’s bottle to warm up in a pot of hot water or risk overheating it in the microwave. This feature ensures that your baby’s milk or formula is warmed to the ideal temperature, so they can enjoy a comfortable feeding experience.
Another benefit of the Parent Choice Bottle Warmer is its versatility. Not only can it warm bottles, but it can also be used to warm baby food jars, making mealtime for your little one even more convenient. Additionally, this bottle warmer is compatible with most standard bottle sizes and shapes, making it a practical choice for parents with varying bottle preferences.
Features
The Parent Choice Bottle Warmer comes with a range of features that set it apart from other bottle warmers on the market. One notable feature is the built-in timer, which allows you to set the desired warming time for your baby’s bottle. This ensures that the bottle is warmed to the perfect temperature without any guesswork.
Another useful feature is the auto shut-off function, which automatically turns off the warmer once the set time has elapsed. This not only ensures safety but also helps to prevent overheating of the bottle. The easy-to-use control panel with clear indicator lights makes it simple to operate the bottle warmer, even in the middle of the night when you need a quick warm-up.
The Parent Choice Bottle Warmer also has a compact and lightweight design, making it easy to take with you on the go. Whether you’re visiting family or going on vacation, you can rely on this bottle warmer to provide a consistent and convenient warming experience for your little one.
Step-by-step Guide To Using Parent Choice Bottle Warmer
Discover the step-by-step guide to using the Parent Choice Bottle Warmer. This easy-to-follow guide will help you warm your baby’s bottle quickly and efficiently. Say goodbye to guessing and hello to convenience with this must-have baby product.
Setting Up The Bottle Warmer
To start using the Parent Choice Bottle Warmer, first make sure you have a clean and dry surface to place it on. Plug the cord into a power outlet and ensure that it is securely connected. The power indicator light should turn on to indicate that the warmer is ready for use.
Adding Water
Next, you’ll need to add water to the bottle warmer. Carefully remove the water reservoir located on the side of the warmer. Fill it with clean, cold water up to the desired level indicated on the reservoir. Make sure not to overfill as it may cause spills when the warmer is in use. Once filled, securely attach the reservoir back onto the warmer.
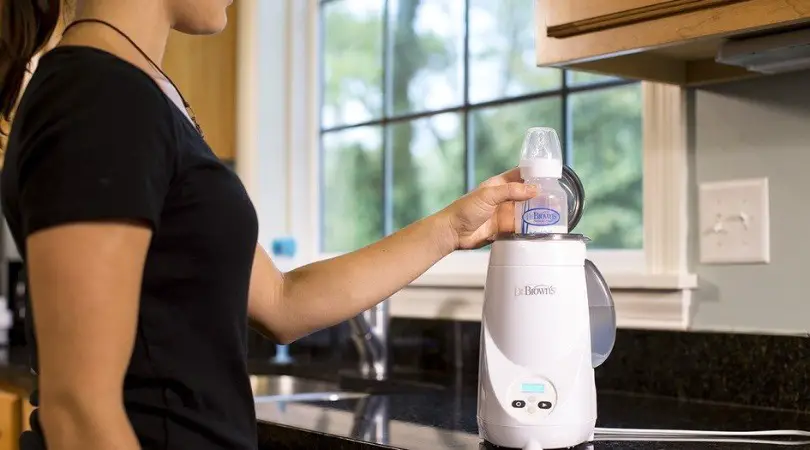
Placing The Bottle
Before placing the bottle in the warmer, ensure that it is clean and free from any obstructions. Remove the bottle cap and any rubber nipples if needed. Place the bottle upright into the warming chamber, making sure it is snug and secure. Avoid overcrowding the warmer with multiple bottles as it may affect the warming process.
Adjusting The Settings
Now it’s time to adjust the settings for the bottle warmer. The Parent Choice Bottle Warmer typically features a simple dial or control panel for easy operation. Turn the dial or press the appropriate buttons to select the desired warming time and temperature. Refer to the user manual for specific guidelines on recommended settings based on the contents of the bottle.
Warming The Bottle
Once all the settings are adjusted, you can start the warming process. Simply press the start or power button to initiate the warming cycle. The bottle warmer will gradually heat up the water, which will then transfer the heat to the bottle. Depending on the settings, it typically takes around two minutes for the bottle to reach the desired temperature.
Cleaning And Maintenance Of Parent Choice Bottle Warmer
Cleaning and Maintenance of Parent Choice Bottle Warmer
Cleaning The Bottle Warmer
Cleaning your Parent Choice Bottle Warmer regularly is crucial to ensure its optimal performance and hygiene for your baby. Follow these steps to clean the bottle warmer:
- Ensure that the bottle warmer is unplugged and cooled down before cleaning.
- Remove the bottle holder and any accessories attached to the warmer.
- Wipe the exterior of the bottle warmer with a damp cloth and mild soap. Avoid using abrasive cleaners that may damage the surface.
- Clean the bottle holder using warm soapy water and a soft brush to remove any residue.
Descale And Sanitize
Regular descaling and sanitizing of your Parent Choice Bottle Warmer is essential to prevent mineral buildup and ensure proper functioning. Here are the steps to descale and sanitize the bottle warmer:
- Prepare a descaling solution by mixing equal parts of white vinegar and water.
- Pour the solution into the bottle warmer, filling it up to the maximum fill line.
- Plug in the bottle warmer and allow the solution to heat for approximately 10 minutes.
- After 10 minutes, unplug the bottle warmer and let it sit for another 10 minutes to allow the descaling solution to work.
- Empty the solution from the bottle warmer and rinse it thoroughly with clean water.
- To sanitize the bottle warmer, use a solution of one part bleach and four parts water.
- Fill the bottle warmer with the sanitizing solution and let it sit for 10 minutes.
- After 10 minutes, empty the solution from the bottle warmer and rinse it again with clean water.
Replacing Parts
Over time, some parts of the Parent Choice Bottle Warmer may wear out and need replacement. Follow these steps to replace parts and ensure the continued functionality of your bottle warmer:
- Identify the specific part that needs replacement, such as the bottle holder or the heating element.
- Refer to the manufacturer’s instructions or the user manual to find the exact replacement part number.
- Order the replacement part from an authorized retailer or directly from the manufacturer.
- Once the replacement part arrives, unplug the bottle warmer and allow it to cool down.
- Remove the old part by unscrewing or detaching it as instructed in the user manual.
- Install the new part according to the manufacturer’s instructions, ensuring it is securely attached.
- Plug in the bottle warmer and perform a test run to ensure the replacement part is working correctly.
By regularly cleaning, descaling, and replacing parts when necessary, you can ensure that your Parent Choice Bottle Warmer remains in optimal condition and provides a reliable and convenient solution for warming your baby’s bottles.
Tips And Tricks For Efficient Use
Discover the best tips and tricks for efficiently using the Parent Choice Bottle Warmer in this informative guide. Learn how to properly fill and clean the warmer, as well as how to warm your baby’s bottle to the perfect temperature.
Preventing Overheating
One of the most important aspects of using the Parent Choice Bottle Warmer efficiently is to prevent overheating. Overheating can not only damage the nutrients in the breast milk or formula but also pose a risk to your baby’s health. To prevent overheating, follow these tips:
- Always start by adding the recommended amount of water to the warmer’s reservoir. This water will act as a buffer to prevent excessive heat.
- Check the temperature of the milk or formula by shaking the bottle gently and testing a few drops on your wrist before feeding your baby. It should be lukewarm, not hot.
- Avoid using the bottle warmer for prolonged periods. If the milk or formula has not reached the desired temperature within the recommended time frame, remove it from the warmer and check if the unit requires maintenance or repair.
Warming Formula Vs Breast Milk
While warming formula and breast milk can be done using the Parent Choice Bottle Warmer, it is important to note that they may require different warming times due to their different compositions. Here are a few tips to keep in mind:
| Type of Liquid | Recommended Warming Time |
|---|---|
| Formula | Follow the instructions provided on the formula packaging or consult with your pediatrician for the recommended warming time. |
| Breast Milk | The recommended warming time for breast milk is generally shorter than formula. Start with a shorter time frame and adjust as needed based on your baby’s preferences. |
Using The Bottle Warmer On The Go
The Parent Choice Bottle Warmer is designed to be portable, allowing you to warm bottles on the go. Here are some tips to ensure efficient use when using the bottle warmer outside your home:
- Before leaving, pre-heat the warmer as per the instructions provided to ensure it is ready to use when needed.
- Carry the necessary amount of water in a spill-proof container to use with the warmer.
- Plan your feeding schedule to avoid delays and ensure your baby’s mealtime is not affected.
Alternatives To Parent Choice Bottle Warmer
While the Parent Choice Bottle Warmer is a popular option for warming baby bottles, it’s always beneficial to explore other alternatives to ensure you find the best product for your needs. In this section, we will discuss other popular bottle warmers, the pros and cons of different brands, and a comparison with the Parent Choice Bottle Warmer.
Other Popular Bottle Warmers
Several other bottle warmers on the market are highly recommended by parents. Here are a few popular options:
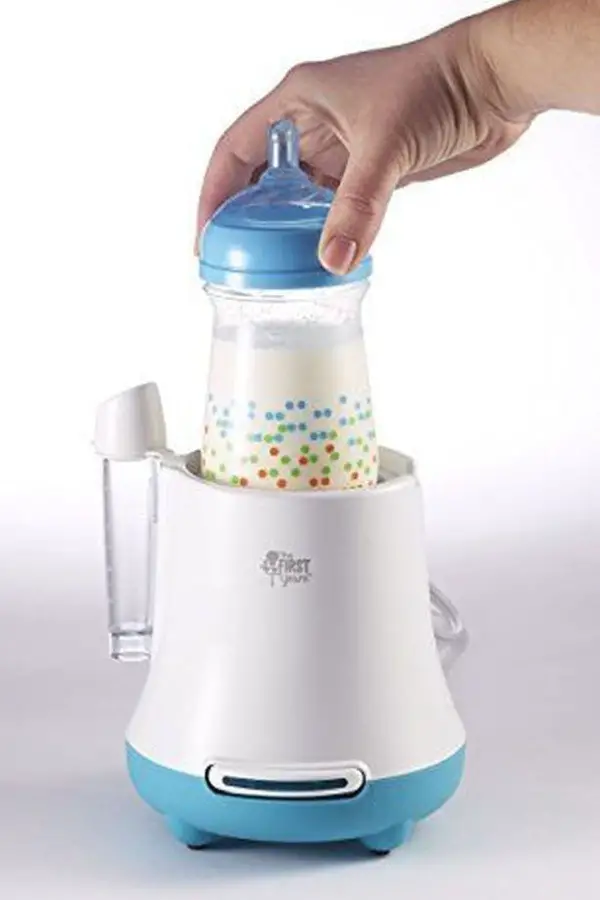
- The First-Year Bottle Warmer
- GROWNSY Bottle Warmer
- The Baby’s Brew Portable Bottle Warmer
- Momcozy Baby Bottle Warmer
- ONEVER Portable Bottle Warmer
Pros And Cons Of Different Brands
Each brand of bottle warmer has its own set of advantages and disadvantages. Here are a few pros and cons of different brands:
| Brand | Pros | Cons |
|---|---|---|
| The First Years Bottle Warmer | Easy to use, affordable | May take longer to warm bottles |
| GROWNSY Bottle Warmer | Fast warming, temperature control | Can be expensive |
| The Baby’s Brew Portable Bottle Warmer | Portable, works with different bottle sizes | Requires batteries or charging |
| Momcozy Baby Bottle Warmer | Multiple warming modes, auto shut-off | Slightly more expensive |
| ONEVER Portable Bottle Warmer | Compact, easy to carry | May not fit larger bottles |
Comparison With Parent Choice Bottle Warmer
When comparing different brands, it’s important to consider the features and specifications of each product. Here is a comparison with the Parent Choice Bottle Warmer:
- Parent Choice Bottle Warmer: Affordable price, simple design, and easy to use.
- The First Year Bottle Warmer: Similar in price, may take longer to warm bottles compared to Parent Choice.
- GROWNSY Bottle Warmer: Faster warming time, but at a higher price point.
- The Baby’s Brew Portable Bottle Warmer: Portability is a key feature, but it requires batteries or charging.
- Momcozy Baby Bottle Warmer: Multiple warming modes and auto shut-off, but slightly higher in price.
- ONEVER Portable Bottle Warmer: Compact and easy to carry, but may not fit larger bottles.
Considering your specific needs and preferences, it is important to compare these different bottle warmers to determine which one suits you and your baby the best.
Frequently Asked Questions
How Long Does Parents Choice Bottle Warmer Take To Warm Up?
The Parents Choice bottle warmer takes around two minutes to warm up. It is a convenient and efficient option for warming bottles for your baby.
How Do I Use My Bottle Warmer?
To use your Parent Choice bottle warmer, follow these simple steps:
- Fill the bottle warmer with water according to the instructions.
- Place the bottle in the warmer and select the desired settings.
- Wait for the bottle to warm up, usually takes about two minutes.
- Once warmed, carefully remove the bottle from the warmer.
- Remember to clean the warmer after each use. Enjoy!
Can You Sterilize Pacifiers In Parents Choice Bottle Warmer?
Yes, you can sterilize pacifiers in the Parent’s Choice Bottle Warmer. It has settings for warming bottles and sterilizing pacifiers and comes with a lid and tray for convenience.
How Much Water Do You Put In A Bottle Warmer?
To use a bottle warmer, add the recommended amount of water to the reservoir. The exact quantity may vary depending on the model. Follow the instructions provided by the manufacturer for accurate measurements.
How Do I Warm A Bottle Using Parent Choice Bottle Warmer?
To warm a bottle using the Parent Choice Bottle Warmer, simply follow these steps:
- Fill the warmer with water.
- Place the bottle in the warmer.
- Select the desired temperature setting.
- Press the start button to begin the warming process.
- Wait for the warmer to heat the bottle evenly.
- Once the bottle is warmed, remove it from the warmer and test the temperature before feeding.
How Long Does It Take For The Parent Choice Bottle Warmer To Warm Up?
The Parent Choice Bottle Warmer typically takes around two minutes to warm up a bottle to the desired temperature.
Conclusion
Using the Parent Choice Bottle Warmer is a convenient and efficient way to warm your baby’s bottles. With easy-to-follow instructions, you can ensure that your baby’s milk or formula is heated to the perfect temperature. The bottle warmer also doubles as a sterilizer, providing peace of mind that your baby’s bottles are clean and safe to use.
Say goodbye to the hassle of heating bottles in the microwave or on the stove – the Parent Choice Bottle Warmer is the ultimate solution for busy parents.